

5 Most Overlooked Routine Car Maintenance Tasks
- Vehicle Maintenance
- PEAK
- October 1, 2025
Tackle routine car maintenance tasks this Fall Car Care Month!
October is back, and that means it's Fall Car Care Month. While most drivers take care of the big stuff, like oil changes and brake pad replacements, a few niche but important jobs don't make a lot of to-do lists. This year, we're looking at five routine car maintenance tasks that drivers often neglect — and why they matter.
We'll cover:
- Under-the-radar fluid checks
- Replacing your windshield wipers
- Checking and cleaning battery terminals
- Changing your cabin air filter
- Inspecting belts and hoses
The good news: you can do many of these routine car maintenance jobs on your own with a few inexpensive supplies, some simple tools, and the right know-how.
Under-the-radar fluid checks
We've talked about automotive fluids before: our spring car maintenance checklist covers them in detail. Here, we'll highlight three such checks that drivers often overlook:
Brake fluid
The older your brake fluid gets, the more it degrades. You might not even notice, since a combination of aging brake fluid and normal driving will usually cause only slight losses in braking performance — at first. However, those performance losses will gradually mount if you don't take action.
If you're lucky, you'll catch the issue early through a spongy brake pedal or a sense that your car isn't stopping like it should. If you're unlucky, you could experience a braking delay or fade that could put you and others in danger.
You can avoid this dangerous situation by making brake fluid checks a part of your routine car maintenance. Here's what to do:
- Examine the fluid's color. Locate the brake fluid reservoir. (Check your owner's manual if you need help). Remove the cap and inspect the fluid — it should be clear or light yellow in color. If it's dark, murky, or brown, it's time for a brake fluid flush.
- If the fluid looks fine, top it off. Your reservoir will have "minimum" and "maximum" indicator lines. If your fluid looks healthy but has dipped below maximum levels, do a refill.
- If it's time for a flush, visit a technician. Brake fluid flushes are a tricky task for beginners, and mistakes can lead to safety risks. If your fluid looks cloudy or brownish, have a technician flush and replace it.
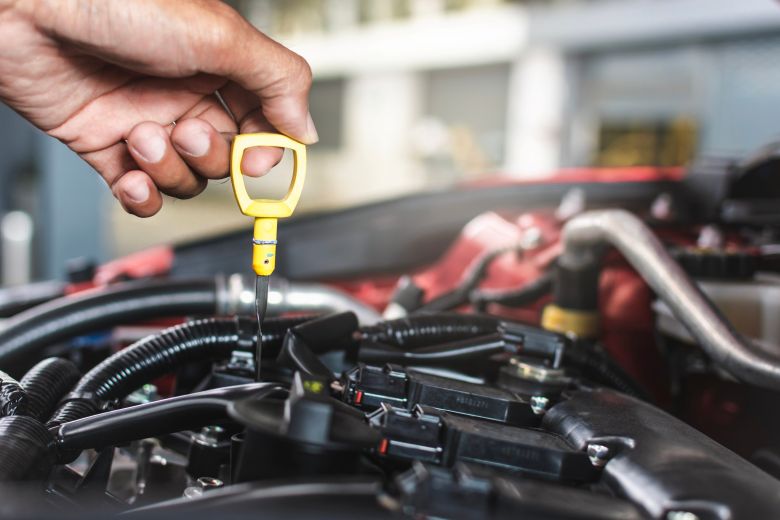
Transmission fluid
If something goes wrong with your transmission, you could be in for a costly fix: according to Kelley Blue Book (KBB), transmission replacements can cost more than $7,000.
Luckily, it's pretty easy to check on things during your routine car maintenance, since transmission fluid is a good indicator of your system's overall health. Follow these steps:
- Find your transmission dipstick. The dipstick will usually be in the engine bay under your hood, further back from your oil dipstick. If you have a newer car, you might not have one. In that case, your owner's manual will explain how to access your transmission fluid.
- Check fluid levels. Start your car, let it warm up, and let it run idle. Take your dipstick and wipe it clean on a rag. Stick it back in, then slowly remove it. Compare the fluid level against the indicator marks ("full," "low," and "fill") on the dipstick.
If your vehicle doesn't have a dipstick, checking your transmission fluid levels becomes way more complicated. You might want to enlist a pro's help if the steps listed in your owner's manual sound above your pay grade.
- Inspect the fluid's condition. Rest your dipstick on a paper towel or white cloth until some fluid transfers to the surface. (No dipstick? You can take a sample from your fill plug instead.)
If the fluid is pink or reddish, it's in good shape. If it's dark brown or black, you've got problems — especially if you also notice a burning odor.
- Fix any issues you find. Top things off if your fluid is healthy but running low. Call your mechanic if the fluid is dark brown or black and has a strong burnt smell.
If you refilled your reservoir because transmission fluid levels were low, check again after a few days (if you drive a lot) or about a week (if you don't drive much). You may well have a leak if the fluid levels dip again after a short time.
Also, check the ground where you park your car. If you detect drips or pools of reddish fluid, you're definitely leaking.
Again, it's probably best to leave the repairs to a pro unless you have automotive technical training. This fix is pretty difficult for your average DIYer.
Antifreeze + coolant
Antifreeze + coolant regulates your engine's operating temperature, preventing overheating. You should check your coolant every 3–6 months during routine car maintenance to make sure your fluid levels are where they should be.
This is an easy, straightforward job:
- Park your car on flat ground and wait for the engine to cool.
- Pop the hood, find your coolant reservoir, and open it.
- Check the level indicator on the side of your reservoir. It will have markings for "full" (F) and "low" (L).
- Using a funnel, top off your coolant levels if they're low.
If it's time for a top-off, grab a jug of PEAK's high-performance antifreeze + coolant. This guide to choosing antifreeze will help you pick the right PEAK product.
Every so often — usually once every 2–3 years or 30,000–50,000 miles — you'll need to drain your cooling system, flush it out, and fully replace the fluid. This is known as an antifreeze coolant flush and fill. You can have a technician perform it for you, or do a flush and fill yourself with the help of a PEAK video tutorial.
While you're at it, check out our complete guide to maintaining your car's cooling system. It's chock full of helpful tips and insights that can help you avoid costly repairs.
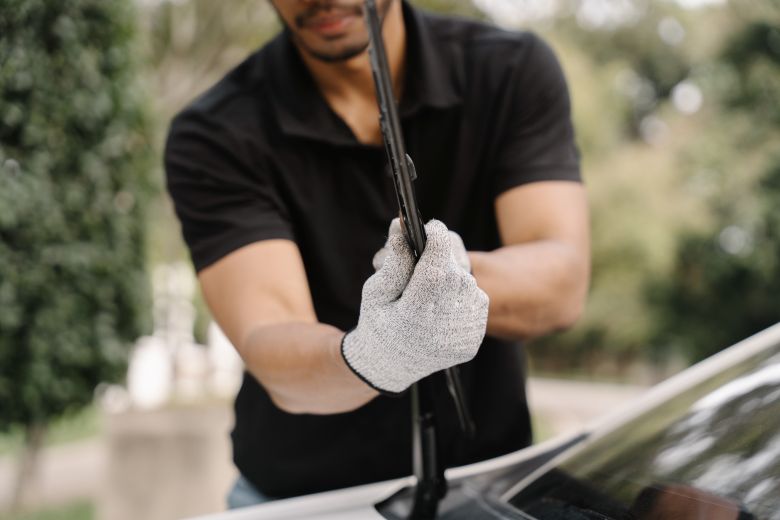
Replacing your windshield wipers
According to the American Automobile Association (AAA), the average motorist only changes their front wiper blades about once every three years. That isn't nearly often enough, as AAA advises drivers to replace wiper blades once or twice annually.
Worn-out wiper blades may skip, chatter, leave streaks, or outright fail to remove rain or snow from your windshield. Your visibility will suffer in any of these cases, opening you up to avoidable safety risks and road hazards.
PEAK is here to help. First, get to know our complete lineup of front and rear wiper blades. You're sure to find a product that's a perfect match for driving conditions in your region.
Then, review our primer on how to remove and replace wiper blades, or check our DIY Hub for how-to videos. You'll find product-specific video instructions for PEAK's Silicone Plus blades, MACH1 blades, Optix blades, and more.
Finally, grab a jug of PEAK windshield wash to use with your new wiper blades, keep your glass clean, and review our tips for extending the life of your new wipers.
Checking and cleaning battery terminals
Your car's battery supplies the spark your vehicle needs to get started, and it also powers your electronics when your engine isn't running. Over time, moisture and chemical reactions can corrode your battery terminals, which can translate to:
- Ignition problems or failure
- Electrical issues
- Loss of battery performance
Once or twice a year, or anytime you notice corrosion on your battery, you should clean the terminals. It's easy — all you need is a 50/50 mix of water and baking soda, distilled water, safety glasses, gloves, and a wire brush.
Here are the steps:
- Disconnect the battery. Start with the negative (black) cable, then do the positive (red) cable.
- Saturate your wire brush with your water and baking soda solution.
- Scrub your battery terminal until the corrosion is fully cleared up.
- Rinse the terminals with distilled water. (Hard tap water can leave mineral deposits.)
- Let the terminals dry, then reconnect each cable. When reconnecting, start with positive (red) and end with negative (black).
Easy peasy, even for a novice.
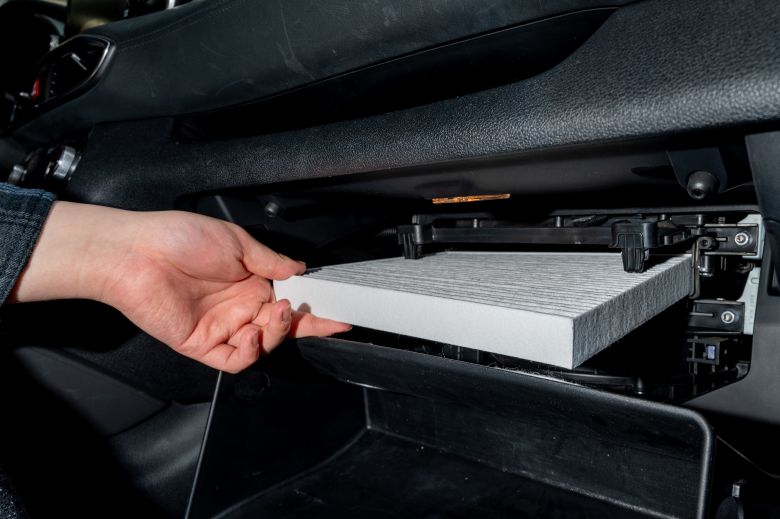
Changing your cabin air filter
Your cabin air filter removes dirt, dust, and debris for the air that gets drawn into your car as you drive. You definitely don't want to be breathing that junk in, so make air filter checks a part of your routine car maintenance routine.
Air filters usually last about 12,000–30,000 miles, depending on your vehicle. (Side note: If you drive on gravel or dirt roads a lot, you'll need to replace your air filter a lot more often.)
Beyond following mileage-based guidance, you can also tell it's time to change your air filter if you notice:
- Strange odors coming from your vents
- Weird noises when your fan is running
- Weaker-than-usual airflow when your vents are working
This is a simple fix, suitable even for the greenest of DIY newbies. Simply locate your air filter compartment — with the help of your owner's manual, if you need it — and open it up. (If anything, you'll only need a regular screwdriver or socket wrench.) Remove the soiled filter, put in a fresh one, and close everything back up.
Inspecting belts and hoses
This final piece of overlooked routine car maintenance can save you some big bucks — it's way cheaper to replace a $100 hose than it is to repair the massive engine damage that belt or hose problems can lead to.
Whenever Fall Car Care Month rolls around, take the opportunity to inspect your belts and hoses. Pay special attention to these two systems:
Accessory belts
Most newer vehicles have a single accessory belt called a serpentine belt (for its snakelike shape). It has multiple grooves and runs through your alternator, air conditioning compressor, water pump, and steering pump. If you have an older car, you might instead have individual V-belts for each of these systems.
In either case, you'll be looking for the same things when you perform your inspection. Open your hood, find your serpentine belt or V-belts (your owner's manual may come in handy), and look for:
- Frayed edges, cuts, or cracks
- Glossy, slick, or glazed surfaces
- Missing chunks or uneven wear
- Misalignment with the belt pulleys
- Squealing noises when the engine is running
If you notice any of these signs, or if it's been more than about 60,000–100,000 miles since you last installed new belts, it's replacement time. Your new belt should be the exact same length and width as your old one, and it should have the same number of grooves.
Problems can also arise from belts that are too tight or too loose. If you're unsure of what you're doing, it's wiser to let a technician handle your belt replacement.
If you end up hiring a pro, have them check your timing belt while they're at it. This important component is difficult to inspect and even harder to replace.
Coolant and heater hoses
Your coolant and heater hoses help regulate engine and cabin temperature, but they're also the most vulnerable component in your cooling system. When routine car maintenance time rolls around, perform these checks:
- With a cool engine, squeeze the coolant and heater hoses between your thumb and index finger. They should feel firm, but slightly flexible. If they feel mushy or squishy, it's time for new ones.
- Look for fraying near the hose connections, pinched or flattened sections, and other signs of damage like nicks, cracks, or puffy spots.
- Inspect areas where the hose bends. Excess ozone exposure can cause parallel stress lines, while a shiny or glassy appearance indicates heat damage. Abrasive wear can also occur here if the hose is rubbing up against things it shouldn't be touching.
Finally, if you're noticing that your coolant levels get too low too quickly, a hose leak might be the cause. Have a pro take a look if you can't spot the problem yourself.
If your check finds anything unusual, play it safe and get new hoses. This is another moderately difficult job where mistakes can cause serious problems, so you may want to entrust it to a pro unless you're totally comfortable with cars.
Connect with more car care tips, all year round
Fall Car Care Month is the perfect time to give your ride a little TLC, especially if you've been putting it off. That said, you don't need to wait — anytime is a good time for routine car maintenance.
Connect with more tips, tricks, and how-to tutorials in PEAK’s DIY Hub. Be sure to check back often — we're always adding to our content library!